Getting started

Your first quote, in six steps.

Set up once, and every quote after that is faster. This guide takes you from a new account to a quote in your client's inbox, and shows you what each screen looks like on the way.

In the app, the Getting started card at the top of the Jobs page ticks each step off as you do it.
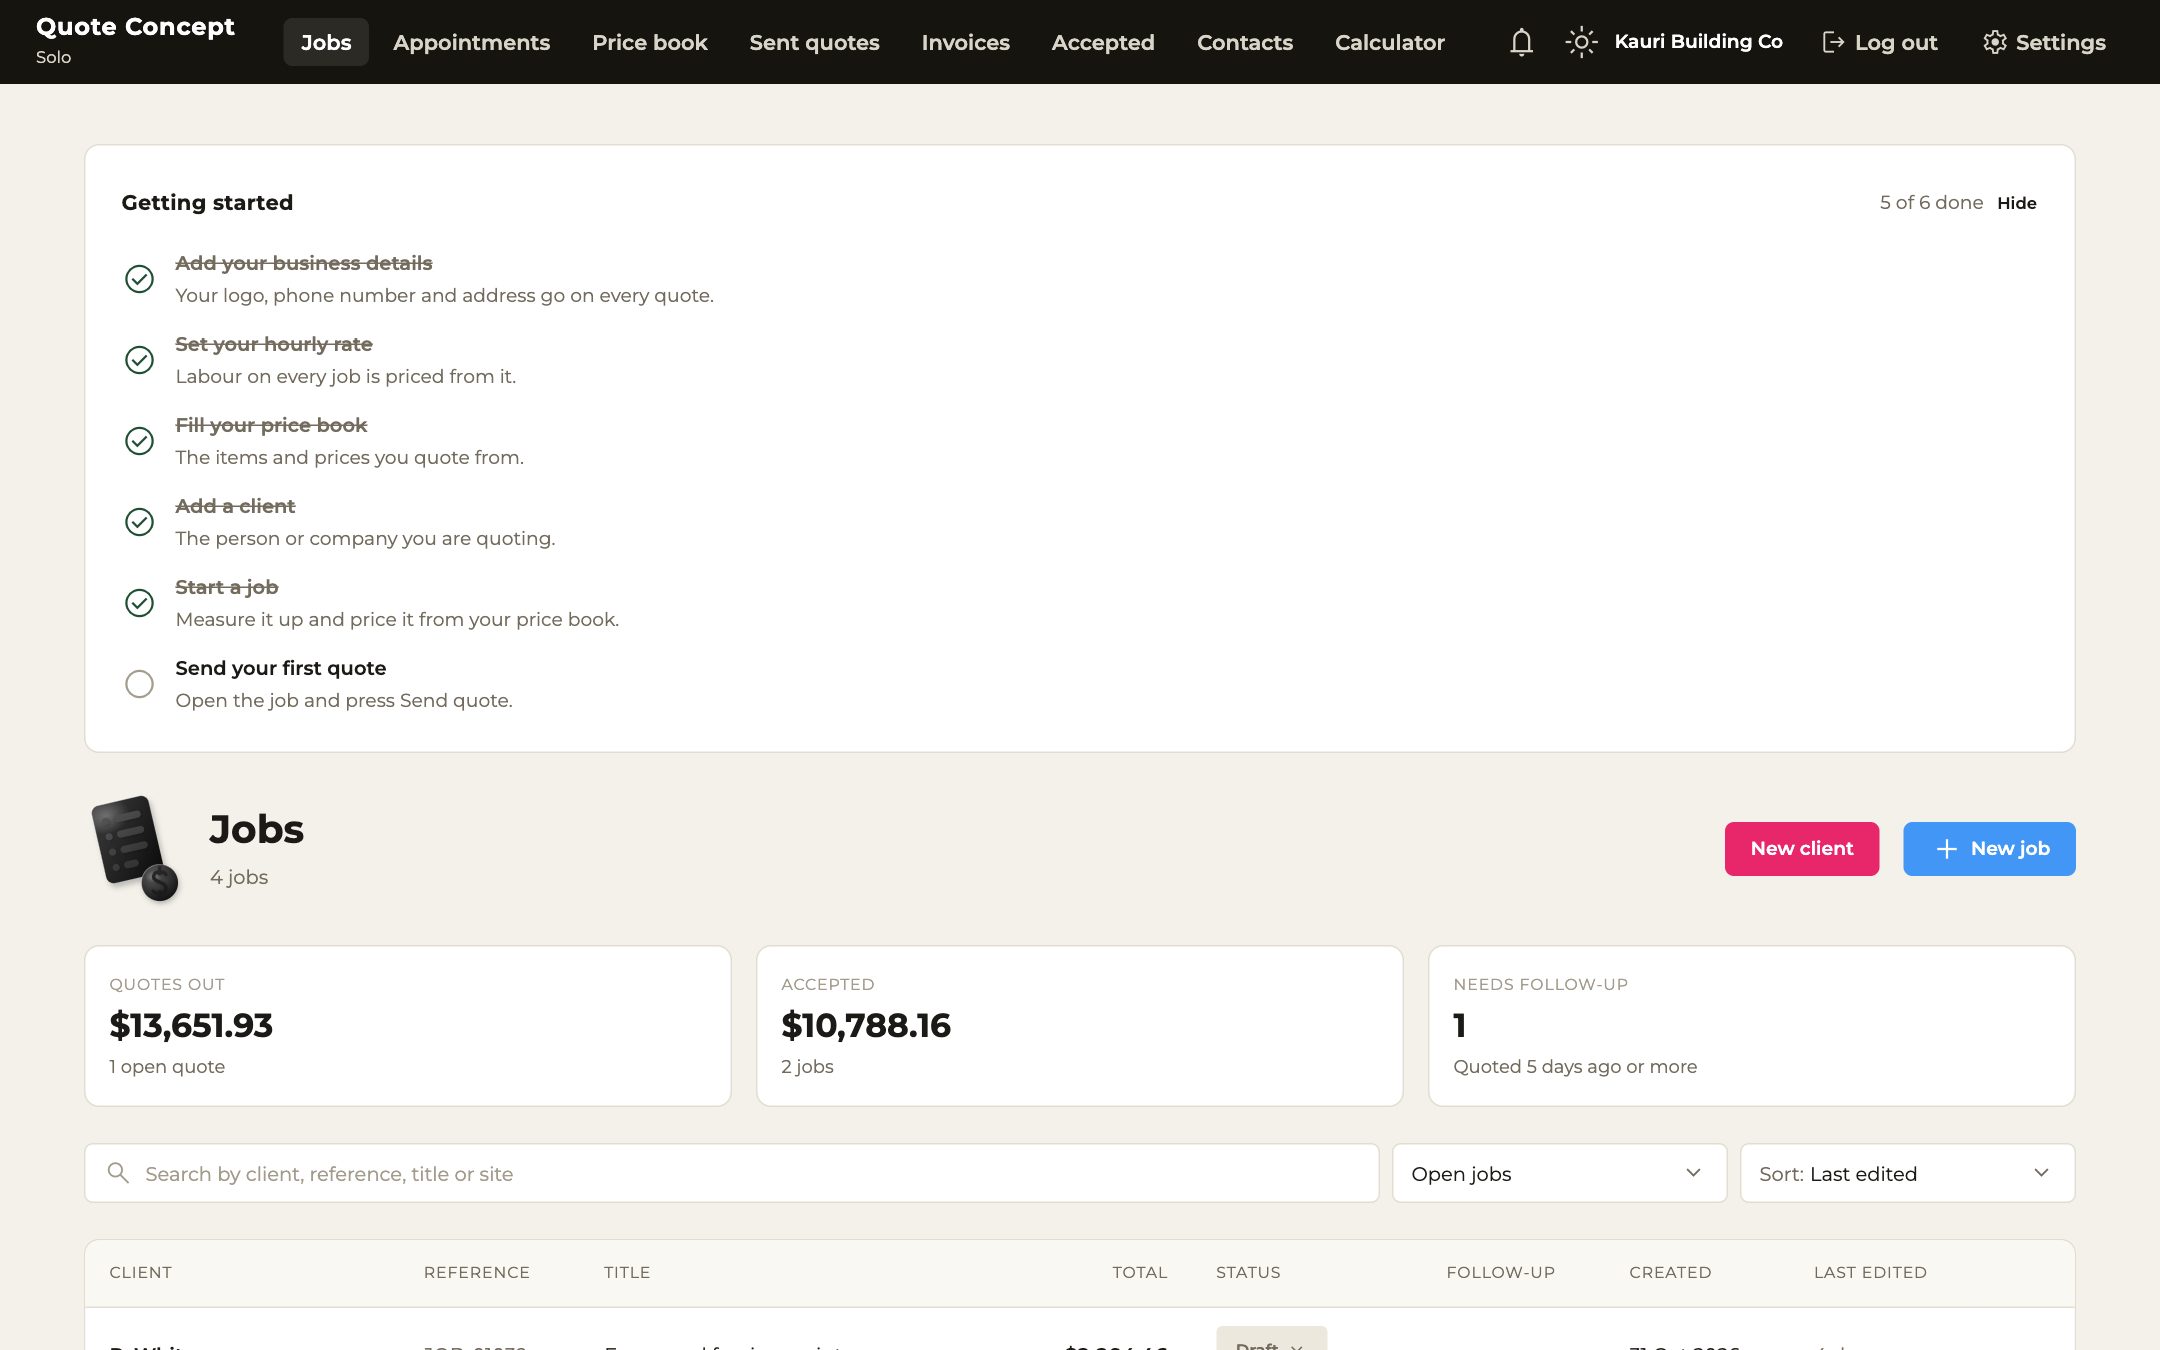
The Getting started card at the top of the Jobs page: six steps, each ticked off as it is done.
The six steps

Do them in this order.

Each step builds on the one before: your rate and your price book are what a job is priced from, and a client is who it is for. Most of it takes a few minutes. The price book is the one worth taking your time over.

  1. 1

    Add your business details

    Your logo, address and phone number go on every quote.

  2. 2

    Set your hourly rate

    What you charge for an hour of your own time.

  3. 3

    Fill your price book

    The items and prices you quote from.

  4. 4

    Add a client

    The person or company you are quoting.

  5. 5

    Start a job

    Measure it up and price it from your price book.

  6. 6

    Send your first quote

    Check it as your client will see it, then send it.

Step 1 of 6

Add your business details.

Your logo, address, phone number and email go at the top of every quote, estimate and invoice you send. It is the first thing a client sees.

  • Open Settings, then the Business tab.
  • Fill in your business name, slogan, address, phone and email, then add your logo underneath.
  • On the Tax and banking tab, add your tax number and the bank account you want to be paid into.
  • Everything saves as you go. The Saved note at the top tells you it has.

This step ticks off as soon as you add a logo, a phone number or an address.
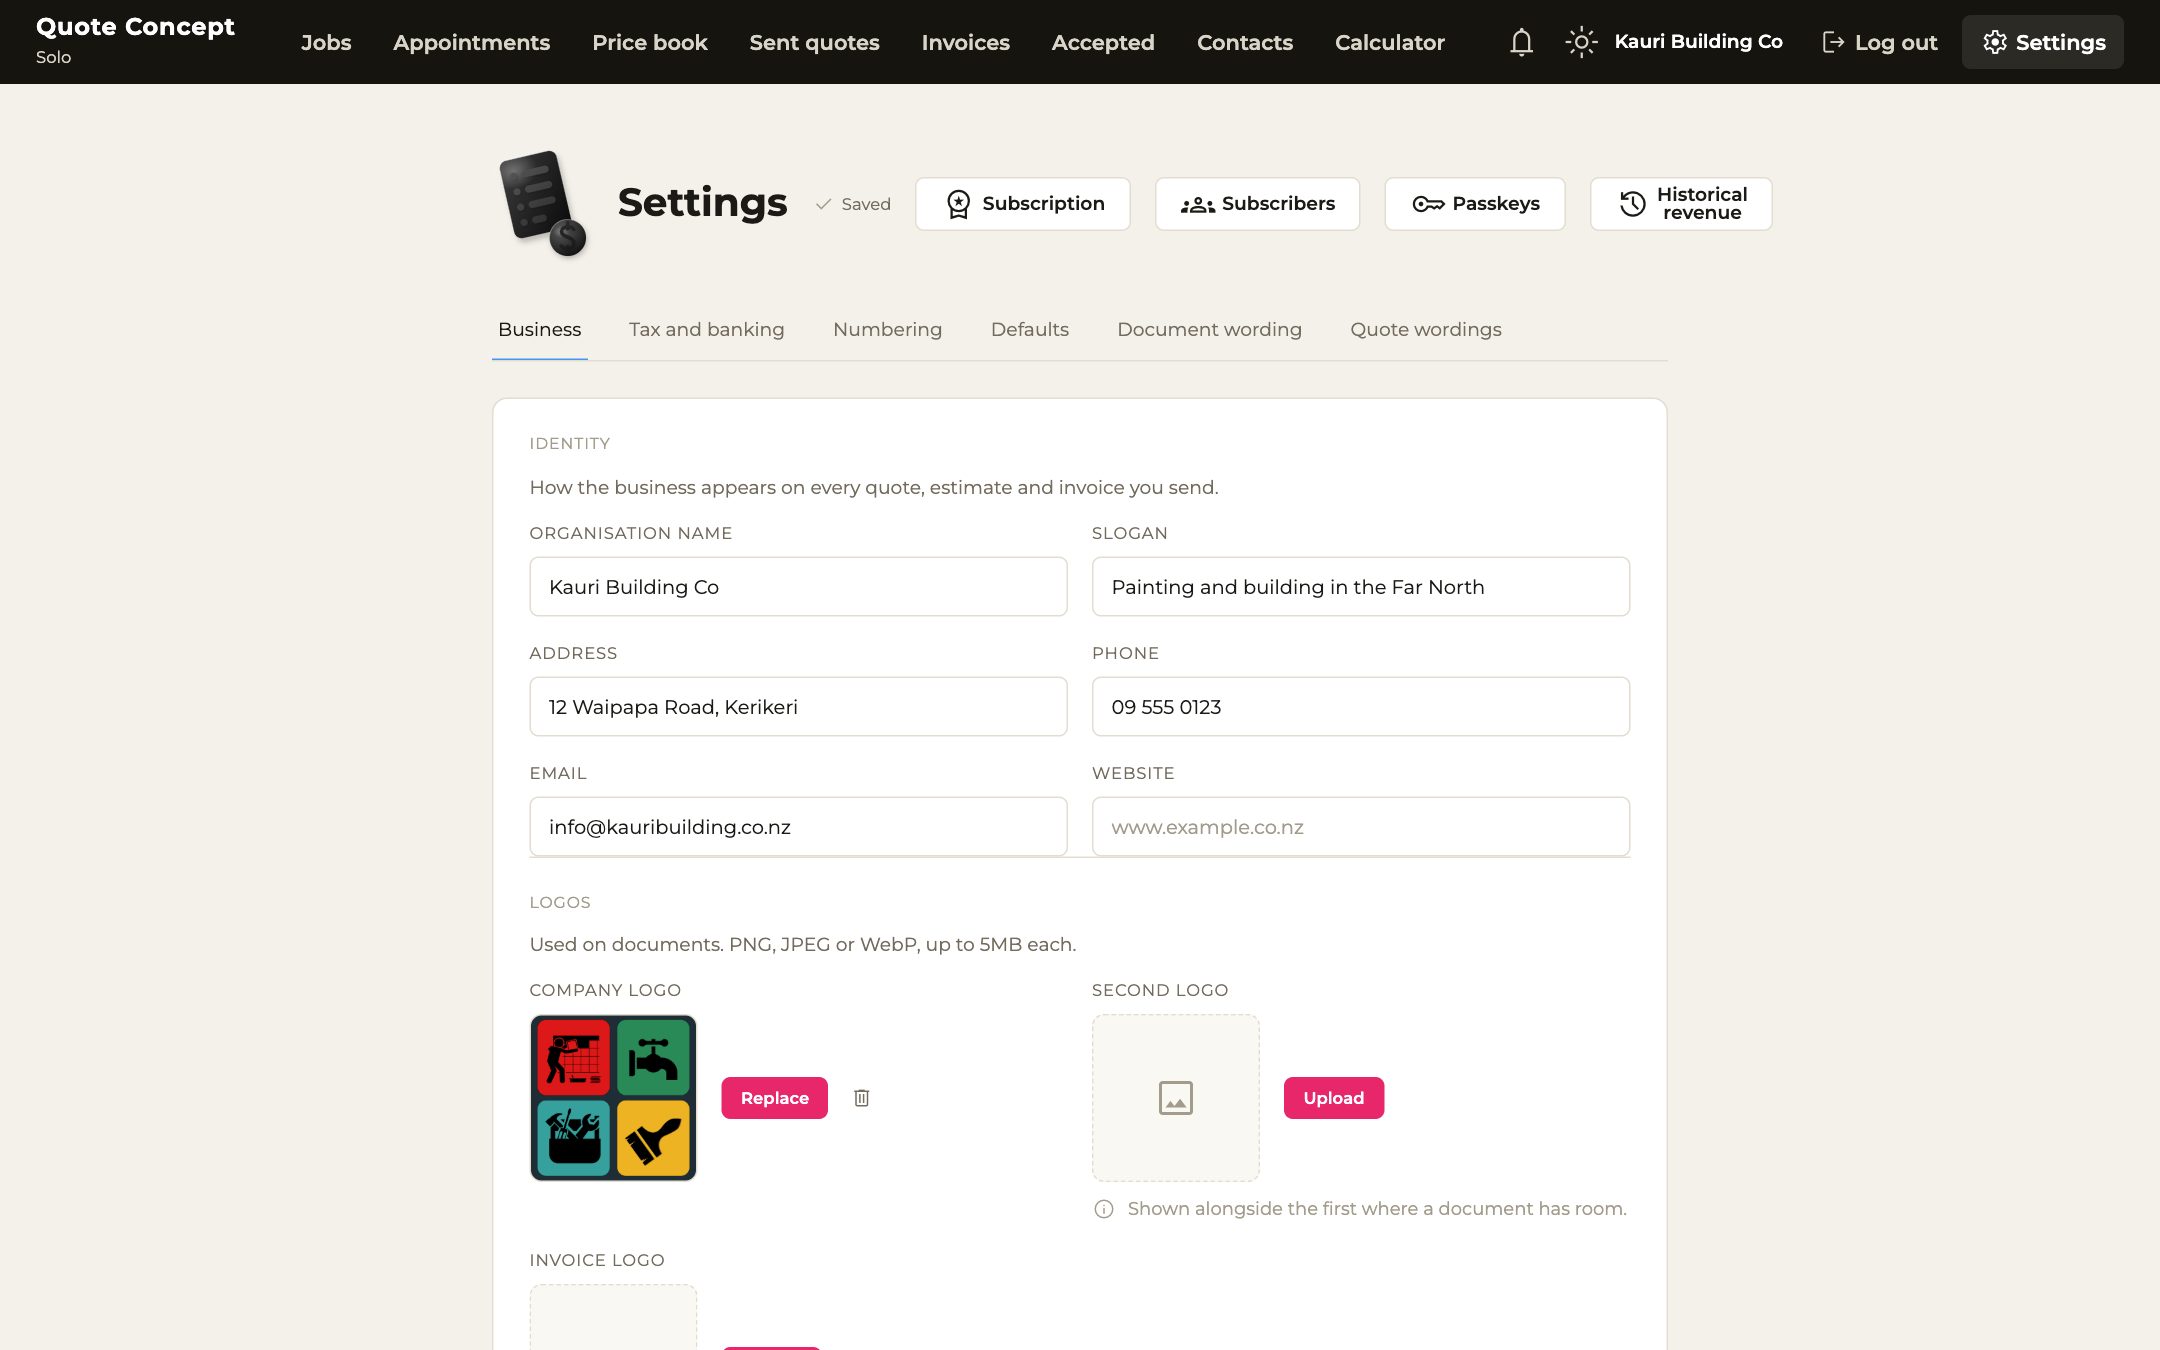
Settings, on the Business tab: the business name, slogan, address, phone number and email filled in.
Step 2 of 6

Set your hourly rate.

The rate you charge for an hour of your own time. Every new job starts from it, so it is worth getting right once.
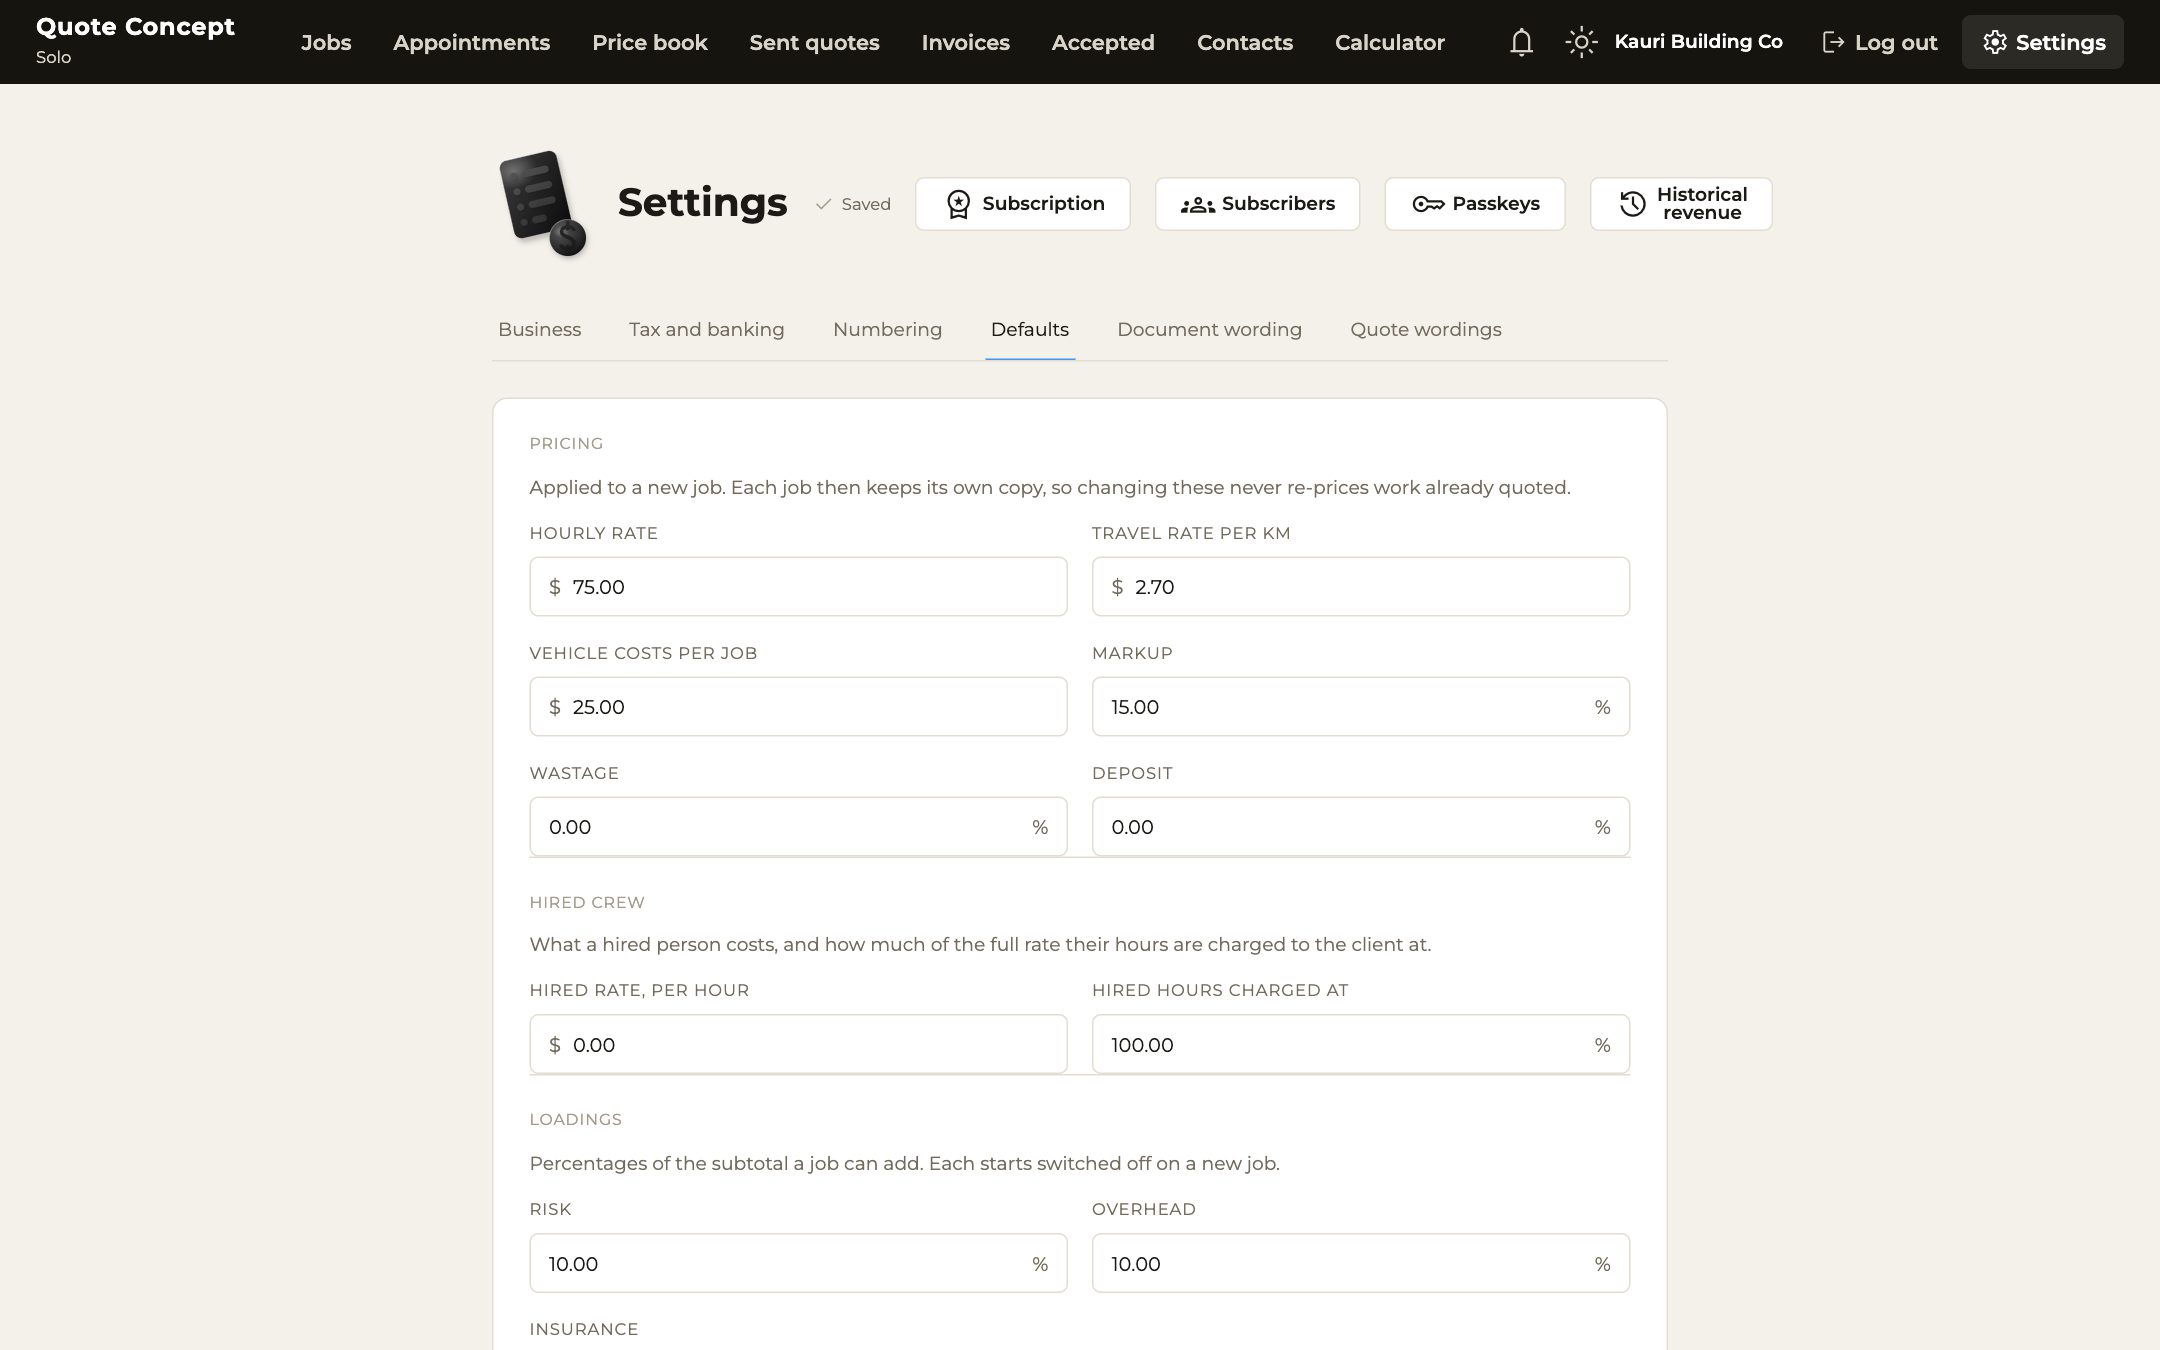
  • Open Settings, then the Defaults tab.
  • Type your hourly rate under Pricing.
  • While you are there, check the travel rate, your markup on materials, wastage and deposit. They are the starting point for each new job.
  • Each job keeps its own copy of these, so changing a default later never changes a quote you have already sent.
Settings, on the Defaults tab: the hourly rate, travel rate, vehicle costs, markup, wastage and deposit.
Step 3 of 6

Fill your price book.

The list of work you quote from. Each item has a unit, the hours it takes for one unit and what its materials cost, so quoting a job comes down to entering quantities.
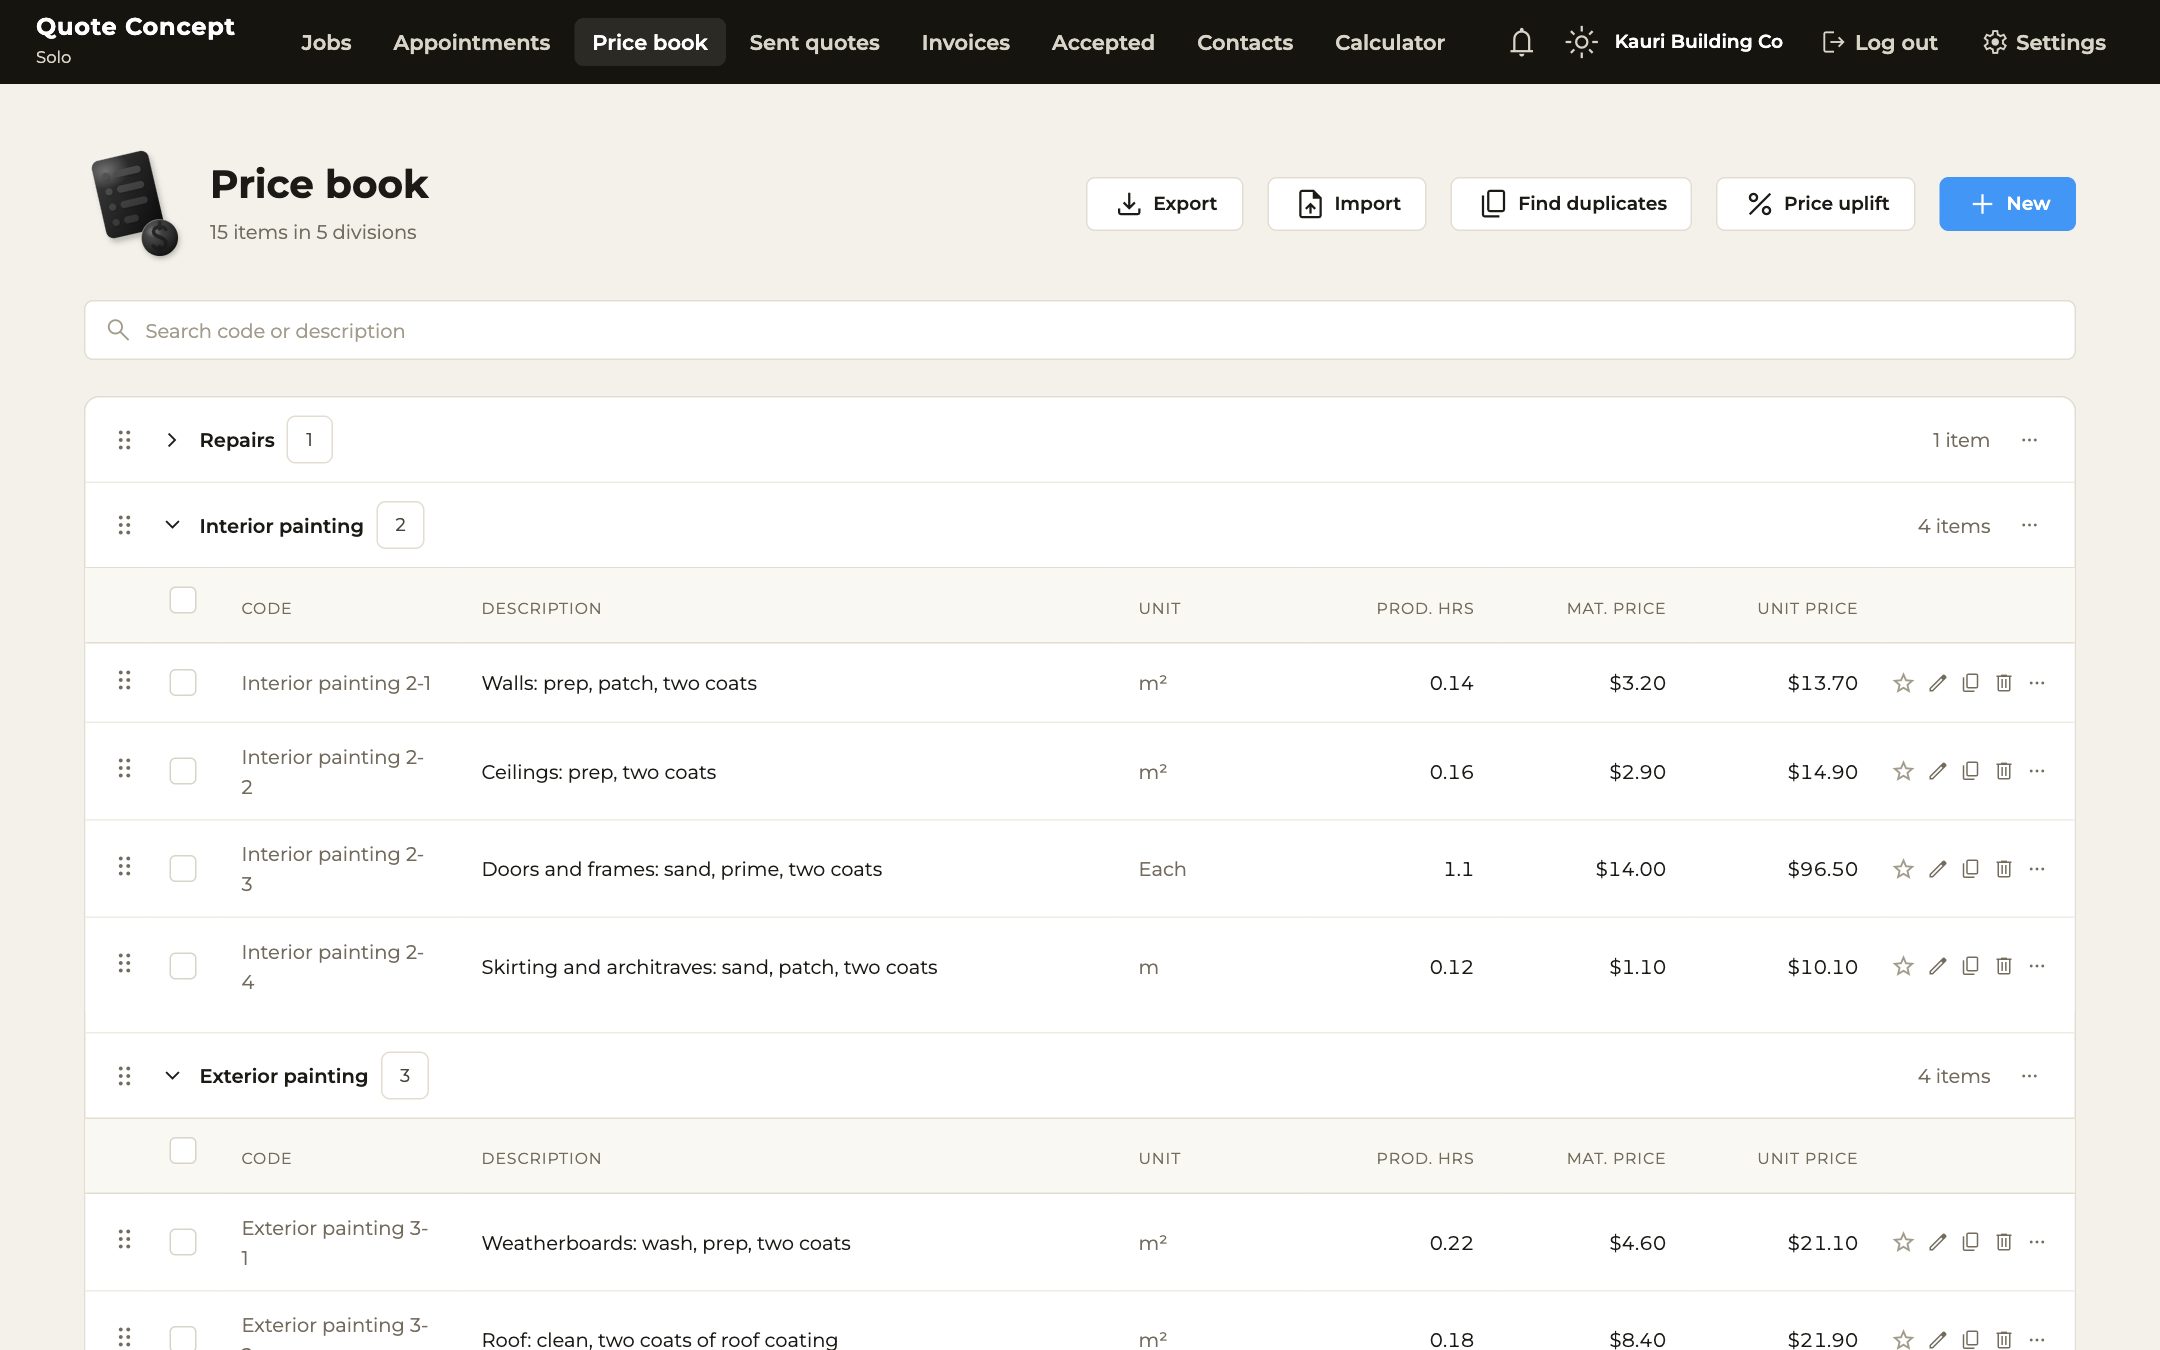
  • Open the Price book from the bar along the top.
  • Press New to add an item, or Import to bring in a list from a spreadsheet.
  • In New Zealand, a new business is offered a ready-made price book to start from, and it can be added later from the New menu. Its prices are examples, so check them against your own.
  • Group items into divisions, such as Interior painting or Decking, so they are easy to find when you quote.
  • When your costs change, Price uplift raises every price in one go.
The price book: divisions of work items, each with its hours, material price and the price for one unit.
Step 4 of 6

Add a client.

The person or company you are quoting. Once they are saved, you pick them from a list whenever you start a job for them.
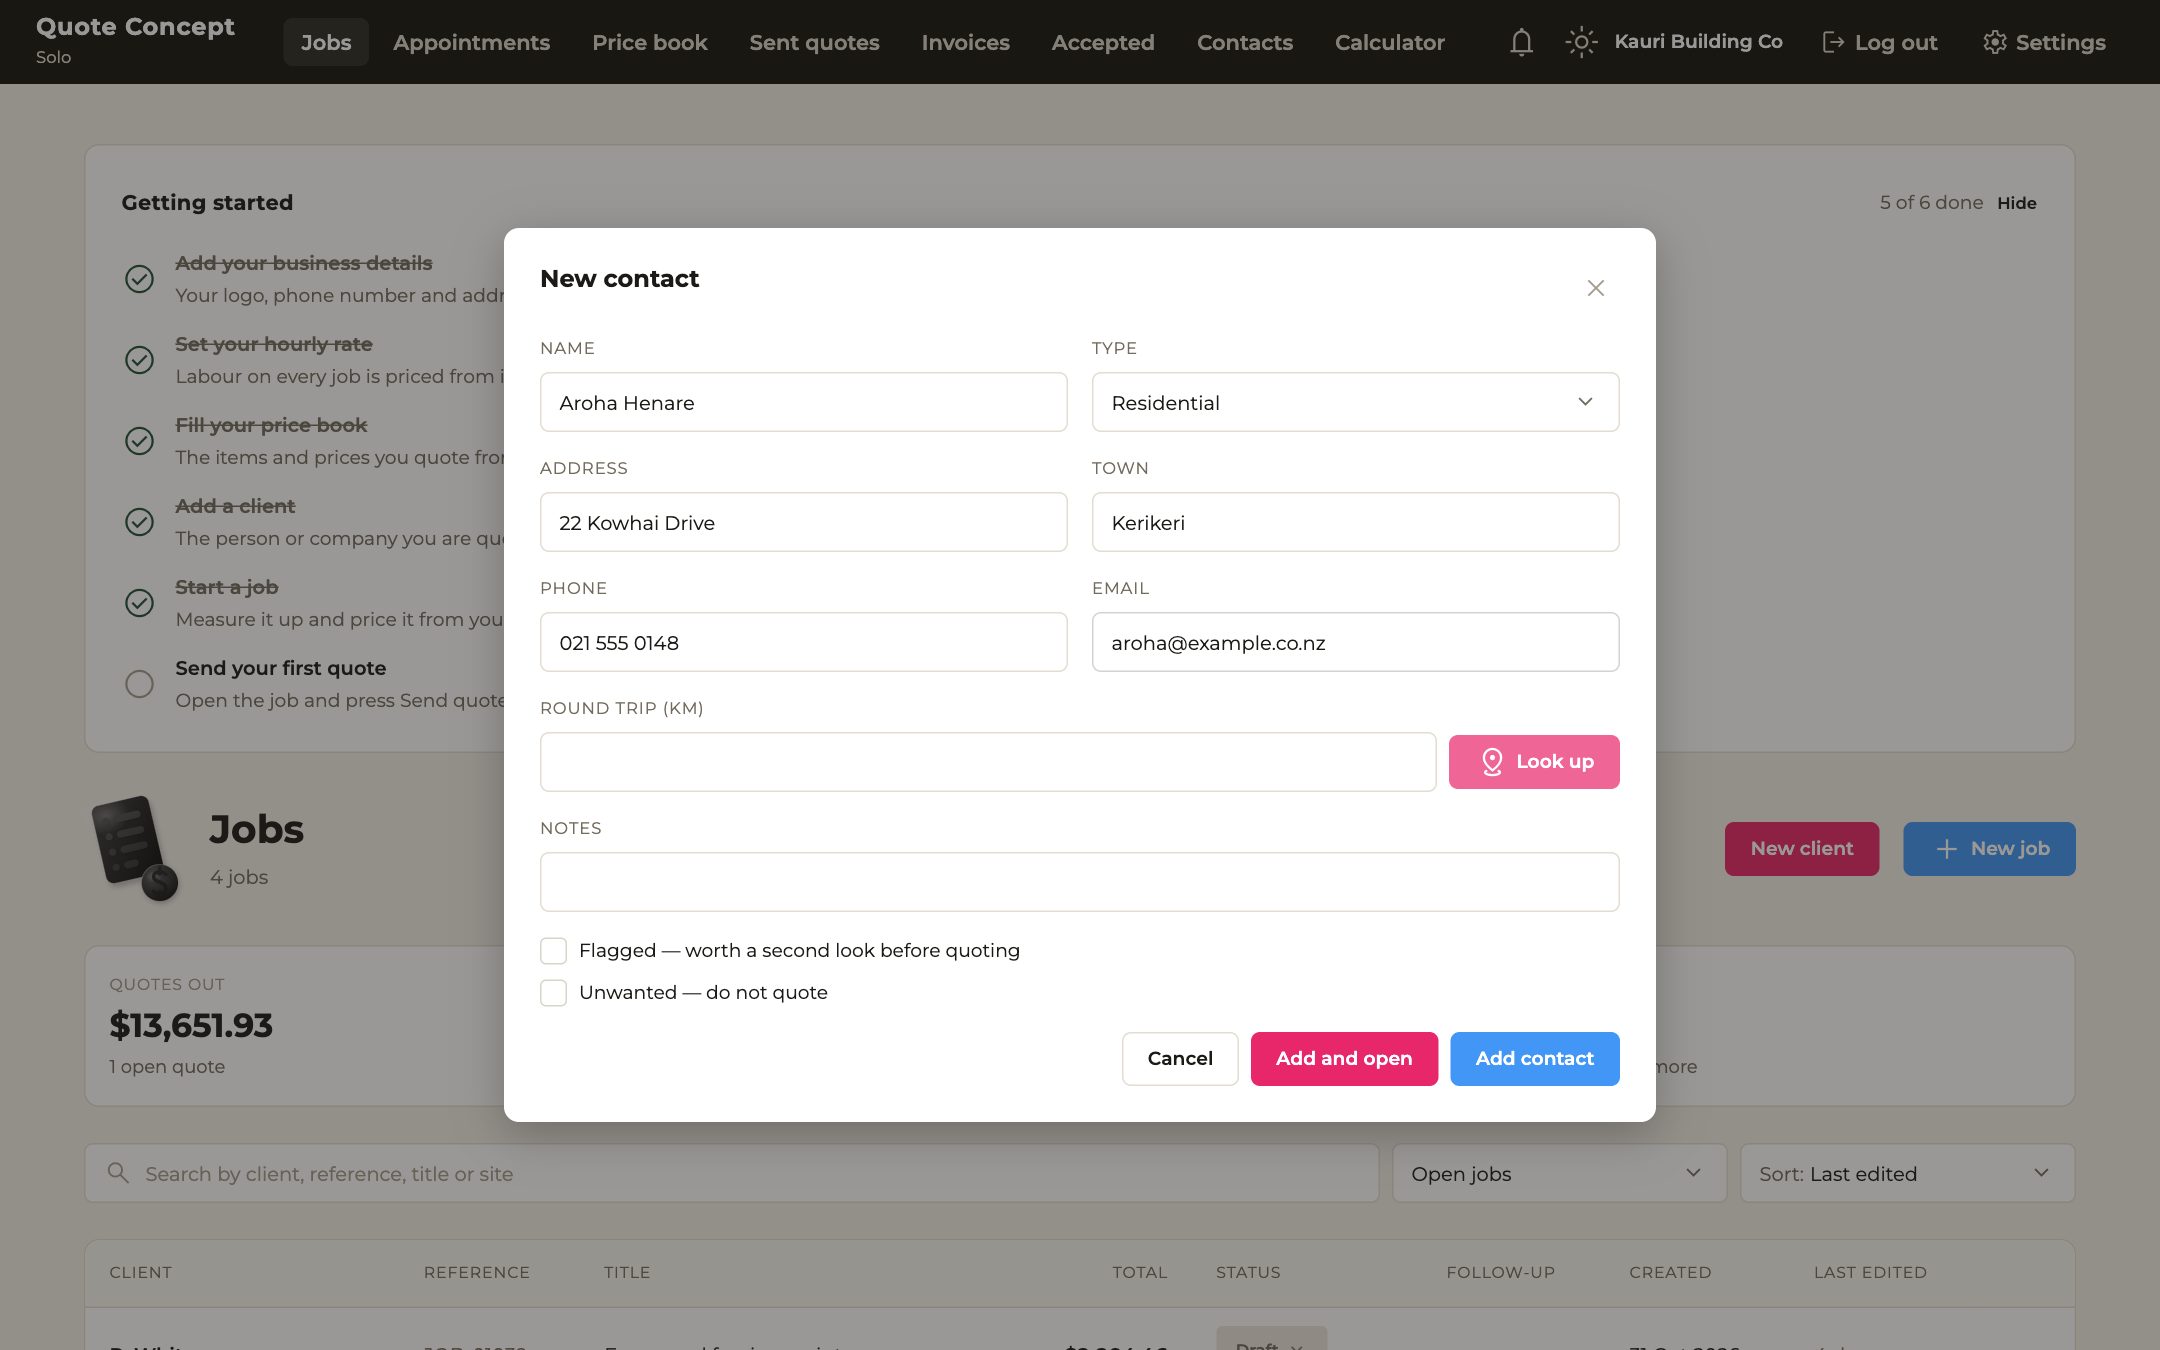
  • On the Jobs page, press New client.
  • Add their name, the address and town of the site, and a phone number and email.
  • The round trip is the distance to the site and back, which is what travel is charged from. Look up can work it out from the address, and you can still change the number.
  • Add and open takes you straight to their page. Add contact keeps you where you are.
The window for a new client, with a name, address, phone number and email filled in.
Step 5 of 6

Start a job.

A job is one piece of work for one client, and it is where the quote gets built. Quantities go in, and the hours, materials and price come out.
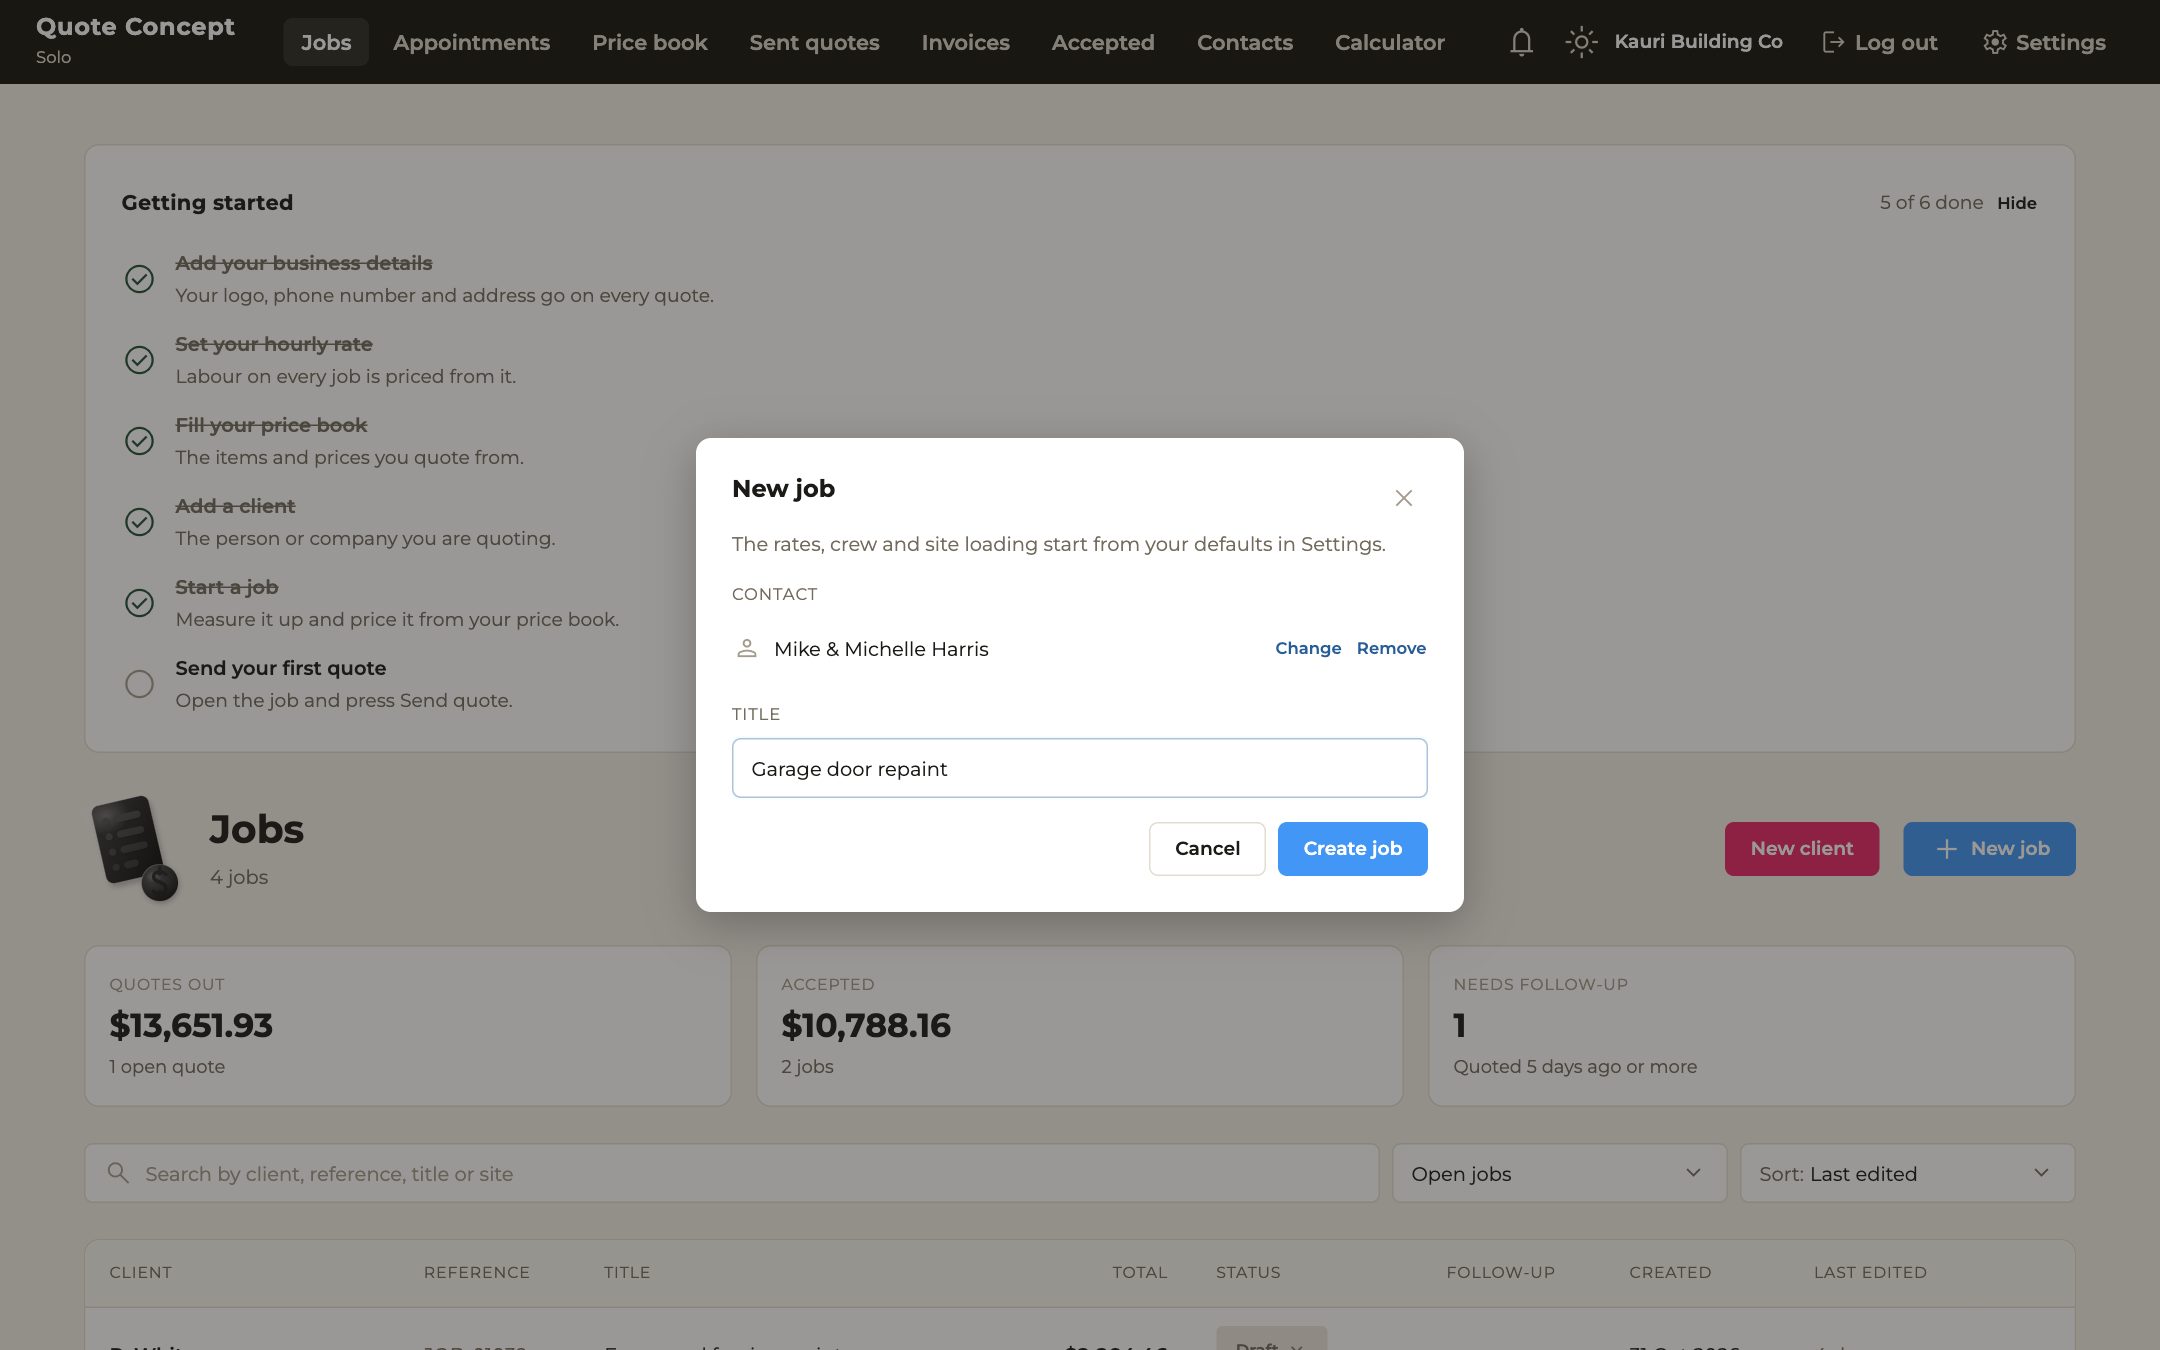
  • On the Jobs page, press New job, choose the client and give the job a title.
  • The rates, crew and site conditions for the job start from your defaults. Check them, and the site address, on the first screen.
  • A job has three screens, shown along the bottom: Job details, Add work and Send.
The window for a new job, with a client chosen and a title typed in.
Step 5, continued

Add the work from your price book.

On the Add work screen, your price book sits on the left and the quote builds up on the right.
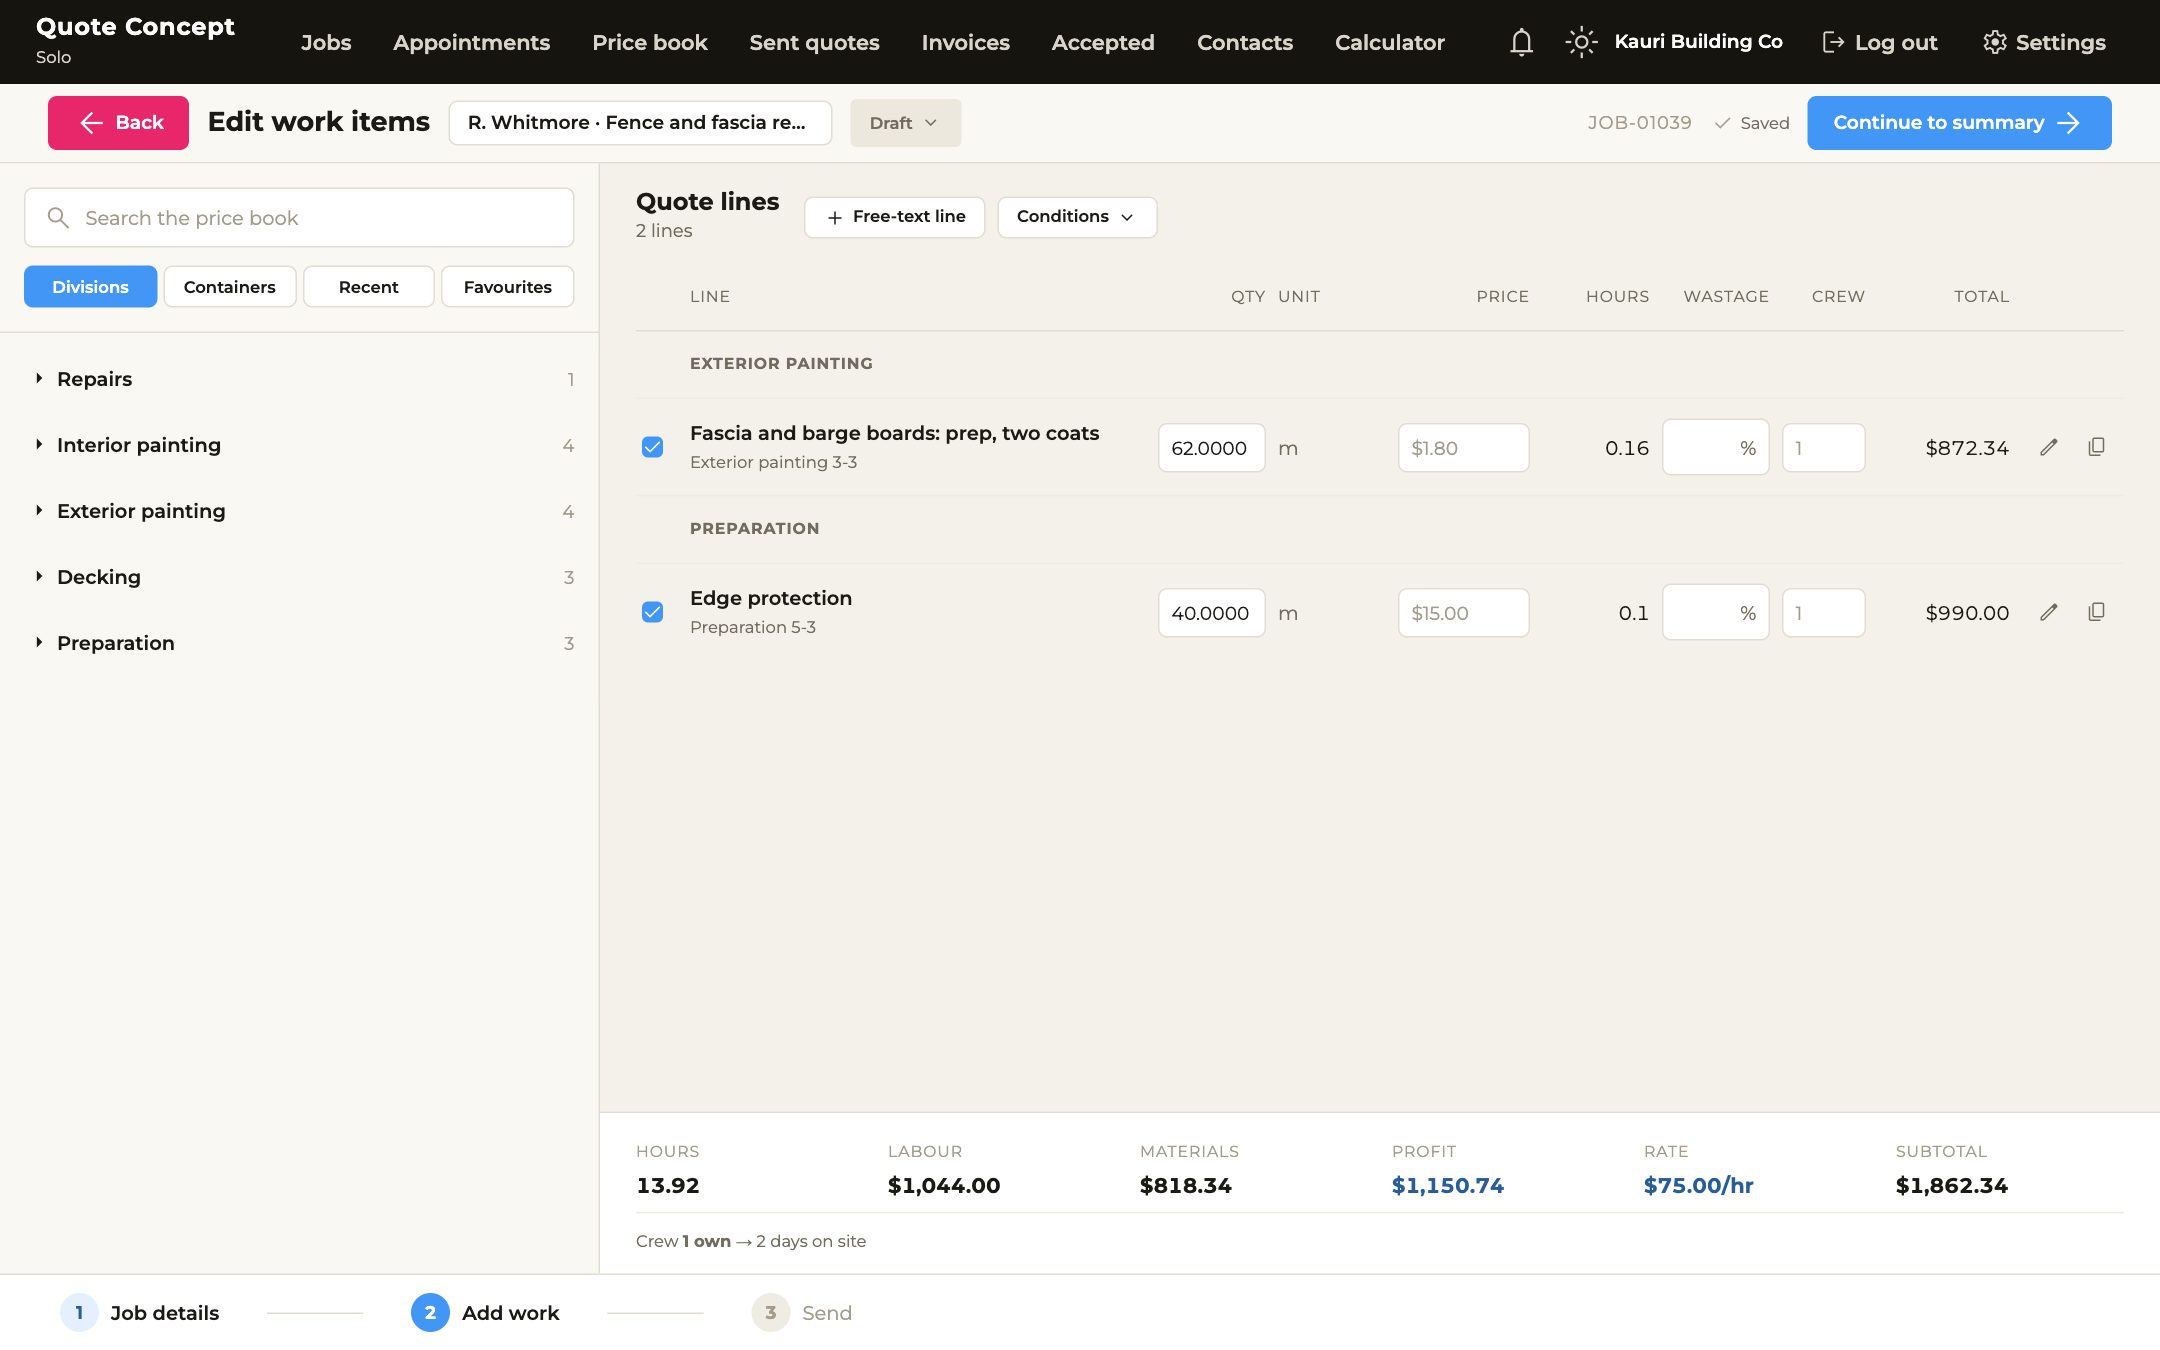
  • Search the price book, or open a division, and tick the items the job needs.
  • Type in the quantity for each one: metres, square metres or how many.
  • The hours, labour, materials, profit and subtotal along the bottom add up as you go, so you can see what the job earns before it goes out.
The Add work screen: the price book on the left, and two quote lines on the right with their quantities, hours and totals.
Step 6 of 6

Send your first quote.

Check it the way your client will see it, then send it.

  • Continue through to the Send screen. You see the quote as your client will: your logo and details, the scope of work, what it costs and the total.
  • Read it over. Print and Download PDF are there if you want a copy of your own.
  • Press Send. Sending freezes the document and gives your client a link to read it on any phone, and to accept or decline it.
  • When they accept with a signature, you hear about it straight away, and the job moves to Accepted, ready for the schedule.

That ticks off the last step, and the Getting started card goes away.
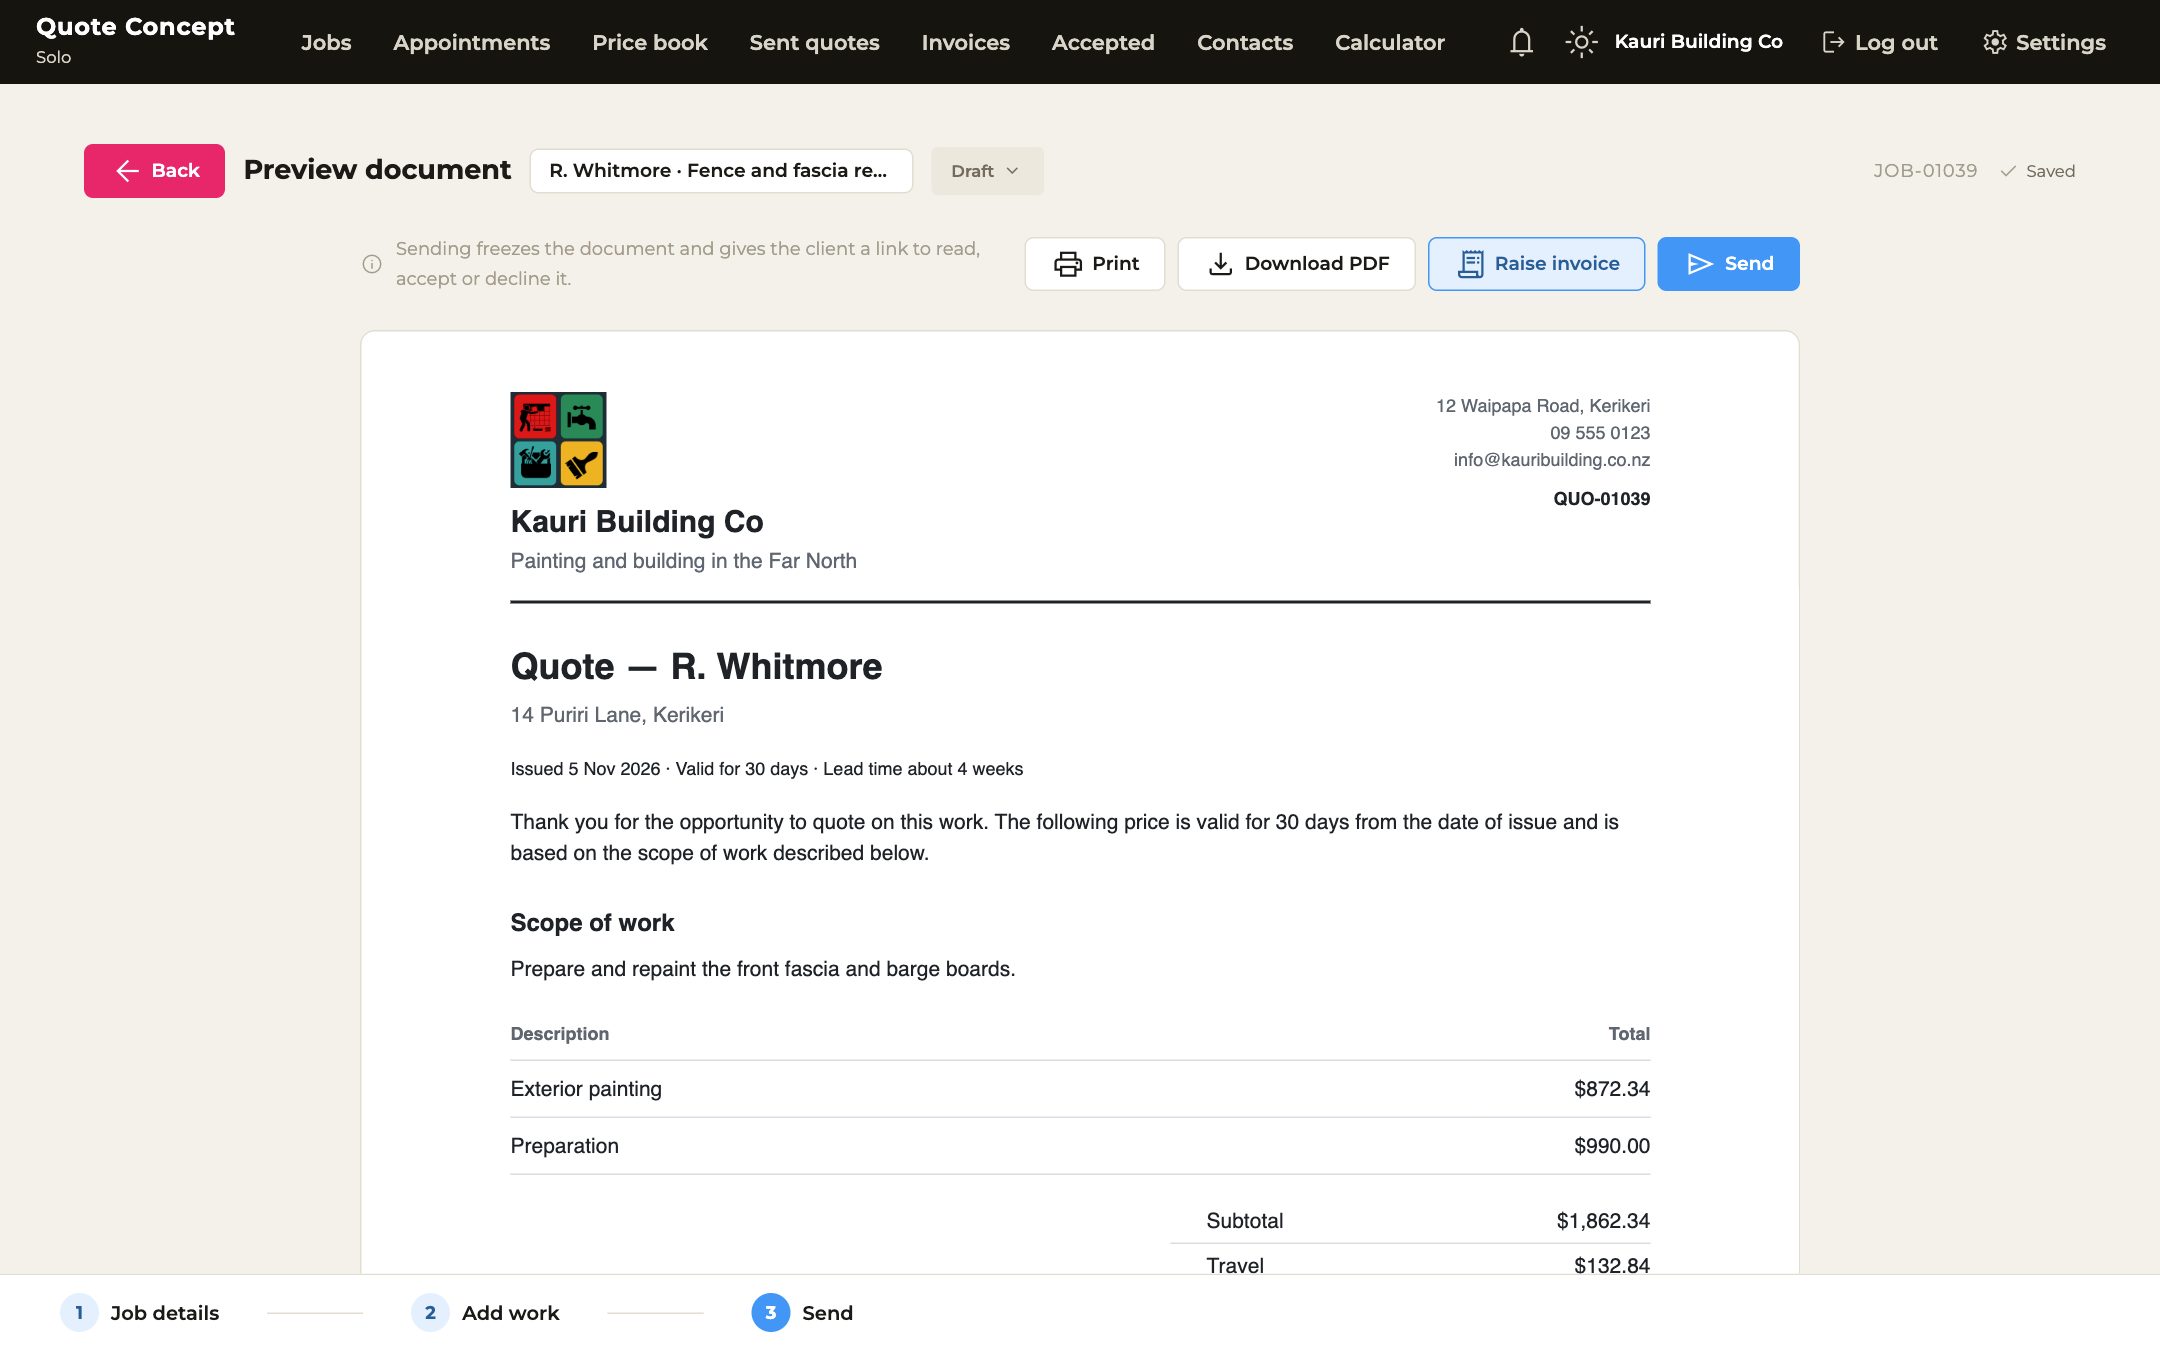
A finished quote ready to send, with the business logo at the top, and the Print, Download PDF and Send buttons above it.
What comes next

From a quote to getting paid.

The same job carries on from here, with nothing to enter twice.

Book it in

An accepted job goes onto the schedule. Move it when the dates change.

Crew & Team

Hand out the work

Email work orders to your contractors, and record hours and bills as the job goes.

Invoice and get paid

Raise a deposit, progress or final invoice from the same job, with any extra work included.

Quote Concept
Stuck on a step?

Ready to send your first quote?

Start your free trial and the Getting started card will walk you through it. If you get stuck, email hello@quoteconcept.com and we will give you a hand.